
Now that GCVE supports vSphere 8.0 and NSX 4.2, when I deployed my new cluster recently, I noticed that the process to create a DHCP enabled NSX segment had changed. The process didn’t change much, but just enough to force me to consult the Google and VMware documentation pages to figure out the new process.
So, I figured it would be worthwhile to share how I did it, in hopes that a step-by-step walk through might help someone else get started quickly.
Overview and high-level explanation
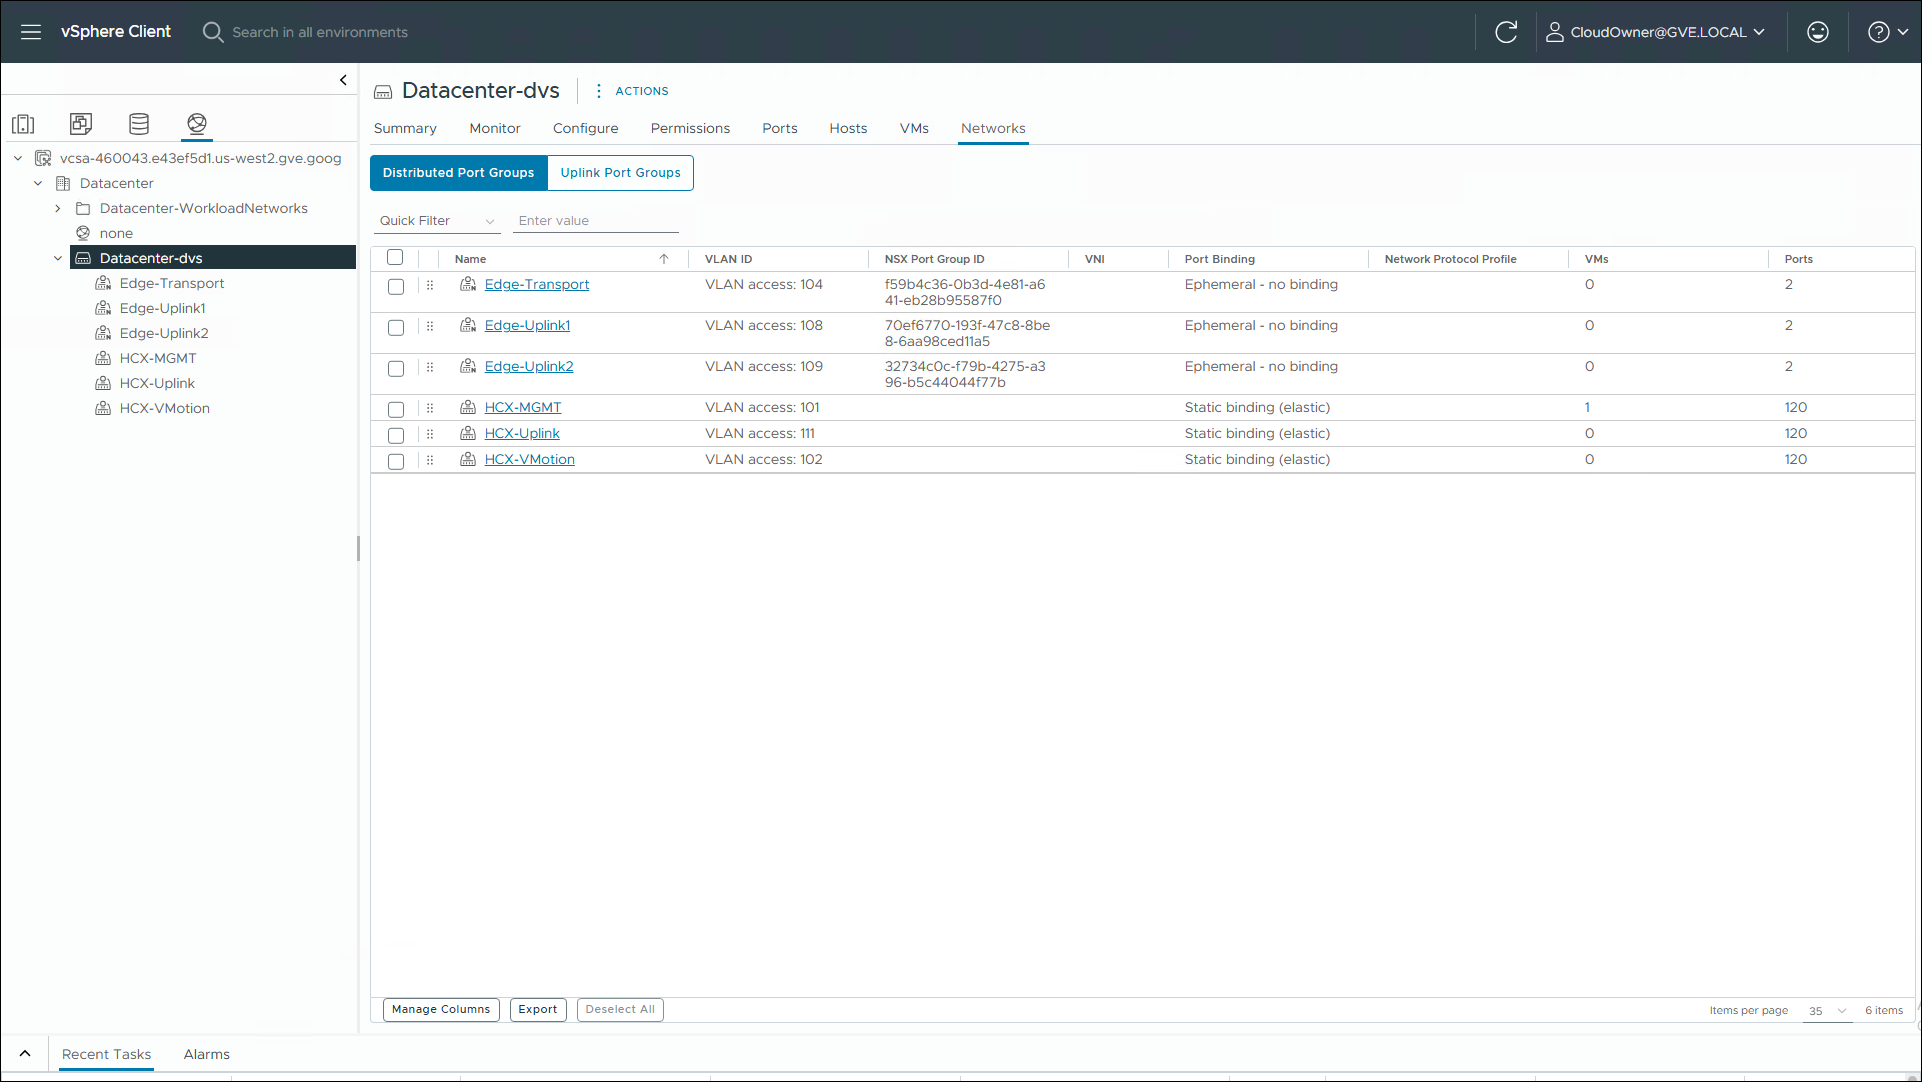
If you will notice from the screenshot above, when a new Private Cloud is deployed, it just has the default Edge and HCX networks, so new overlay subnets for your workloads need to be added through NSX manager.
At a high level, you first create a DHCP profile, assign that profile to your Tier-1 gateway, create a segment for your subnet, and then assign DHCP options to it. Here is how I did it:
Creating the DHCP Profile
- Log into the NSX Manager with the link and credentials from your private cloud’s information page.
- To create the DHCP profile:
- From the NSX home page, click Networking -> Networking Profiles -> DHCP -> Add DHCP Profile
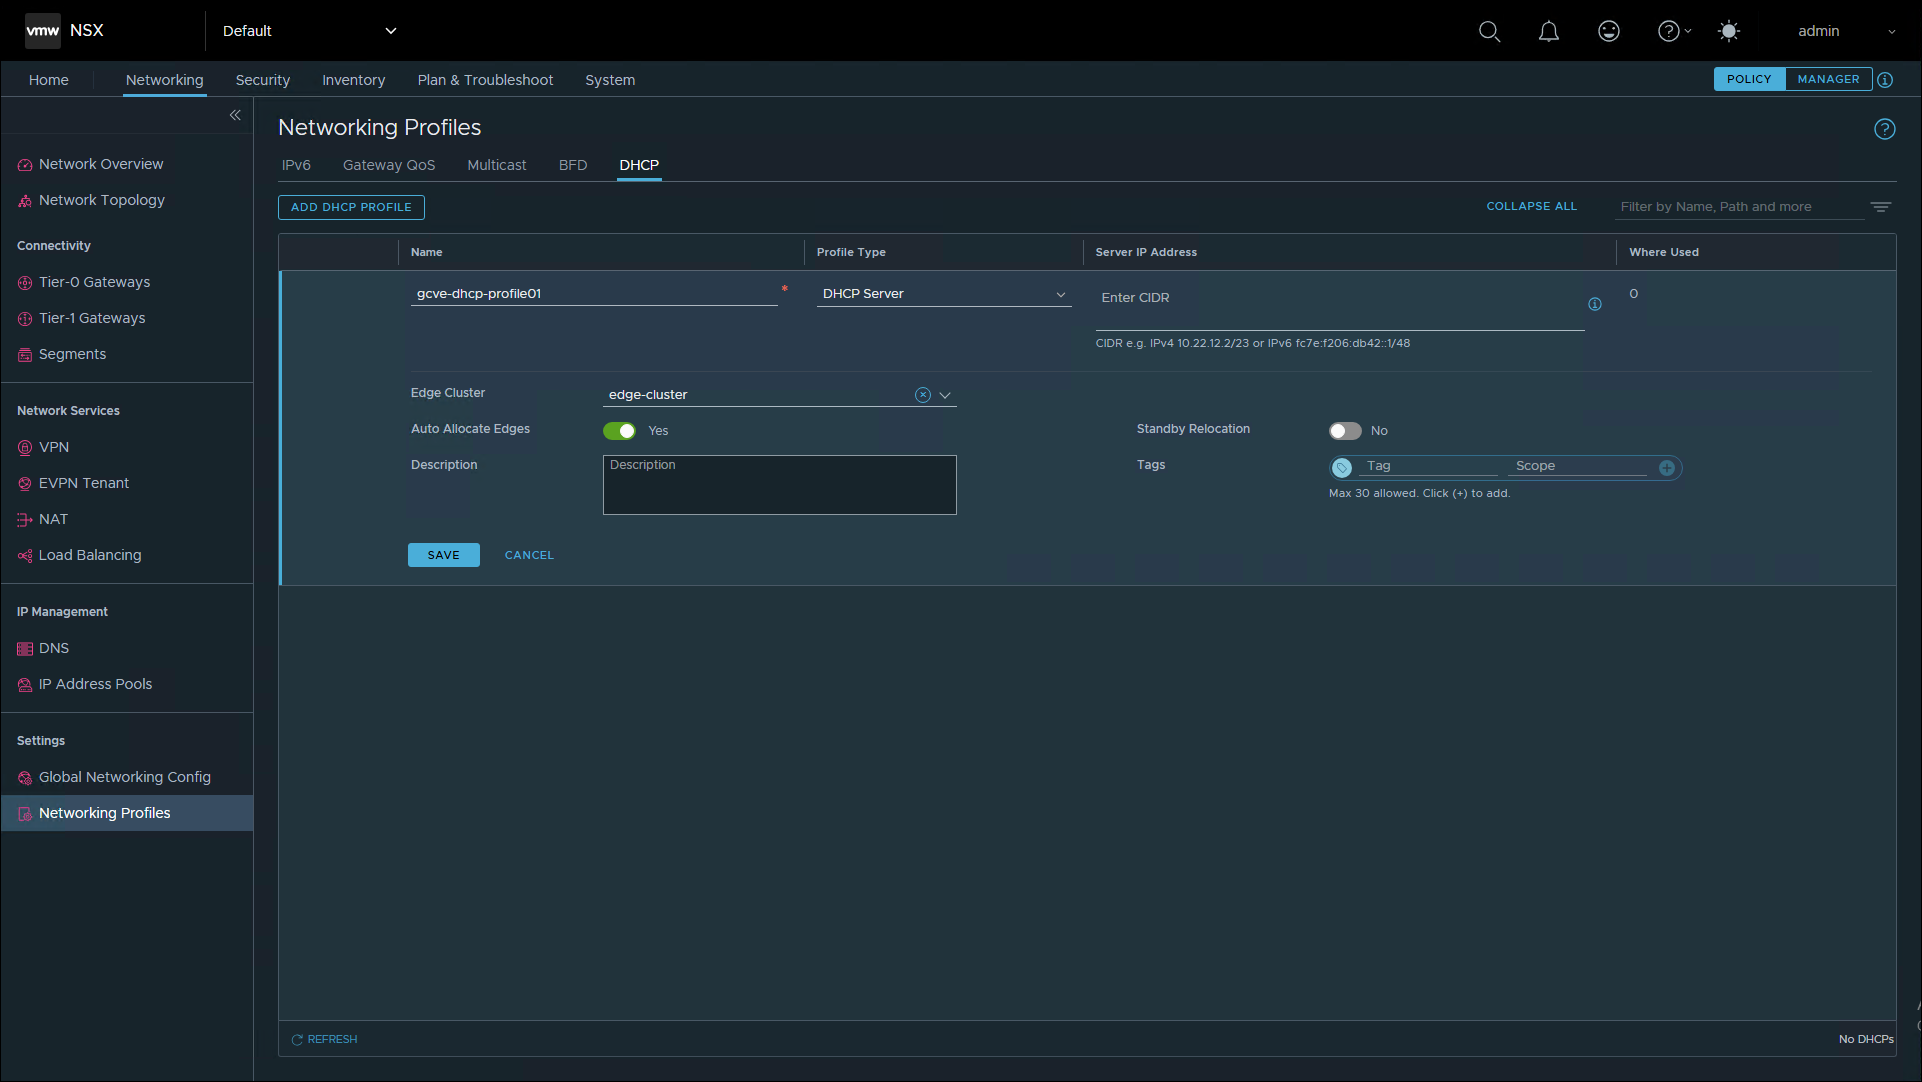
- Enter the required information:
- Name: Pick a name. I named mine “gcve-dhcp-profile01”
- Profile Type: DHCP Server
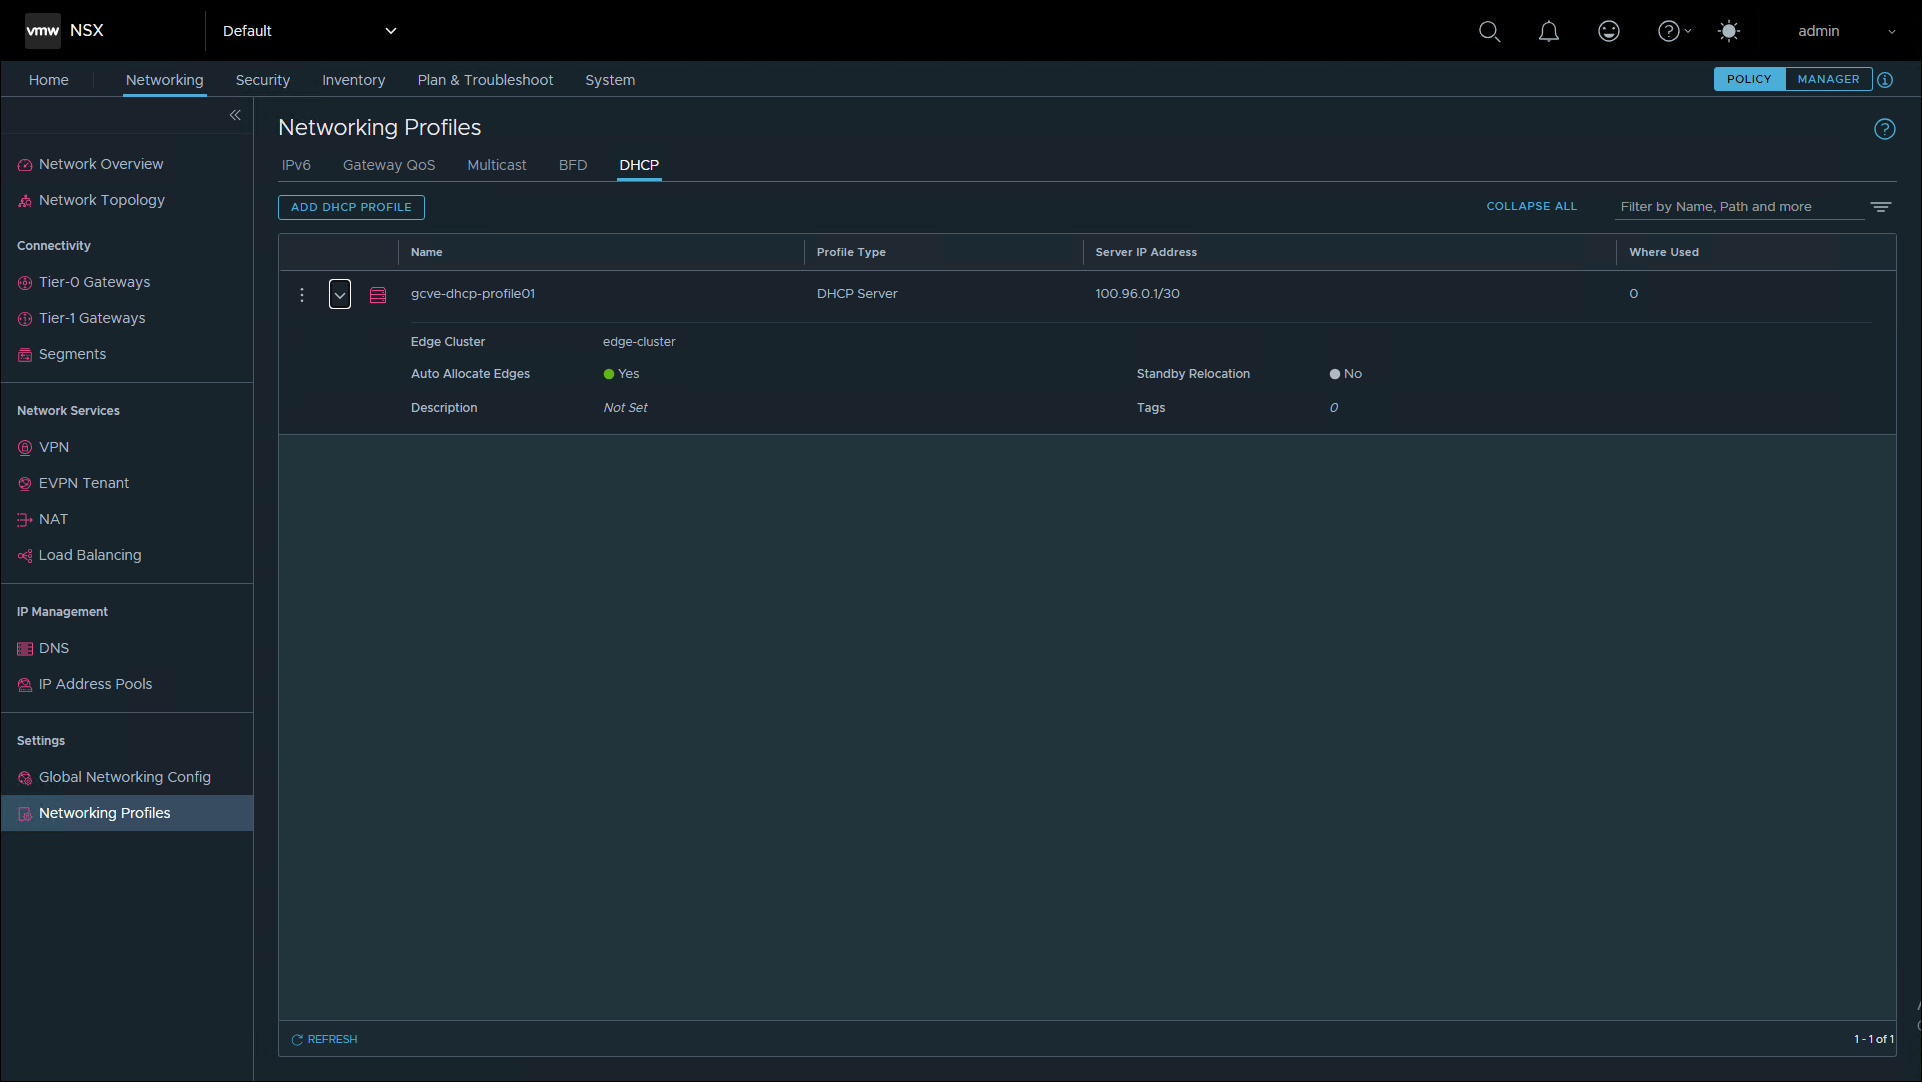
- Server IP Address: This can be left blank (it will auto assign something like 100.96.0.1/30), or you can assign an IP address yourself if you would prefer. (more on that topic later/below)
- Edge Cluster: edge-cluster
- Click Save
Assign the DHCP profile to the Tier-1 Gateway
- Select Tier-1 Gateways -> Expand the existing Tier1 -> Three-dots – Edit -> DHCP Config – Set
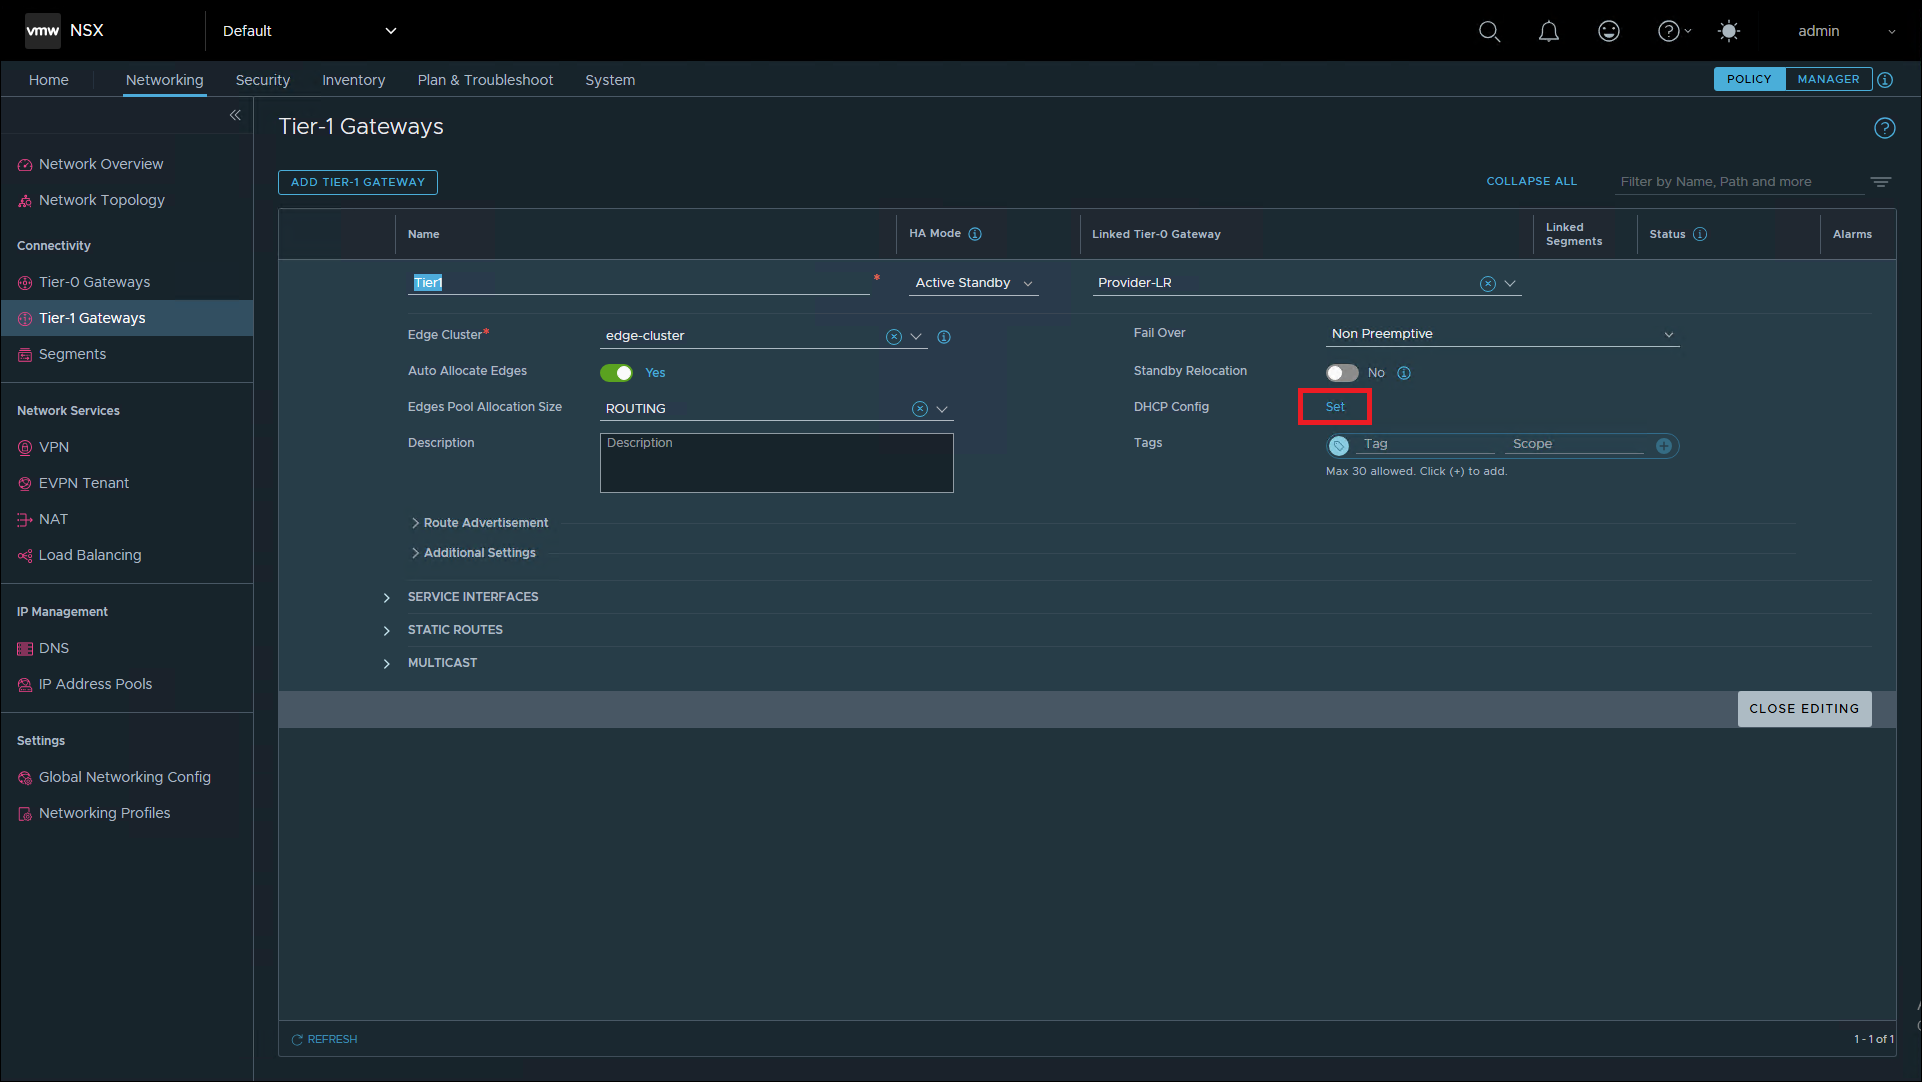
- Set DHCP Configuration
- Type: DHCP Server
- DHCP Server Profile: The profile you created previously (i.e. “gcve-dhcp-profile01”)

- Click Apply
- Back on the Tier-1 Gateway settings page, click Save, then Close Editing.
Creating a new network segment
The last step is to create a new segment for your workloads. This creates an NSX overlay network that you can assign your network subnet.
- From the left-hand menu, click Segments, then Add Segment.
- Name: Choose a name for the segment, I named mine “wkld-10.255.40.0/24”
- This name will appear in DVS switch in the vSphere client and when you assign networks to vNICs, so name it something meaningful.
- Connected Gateway: Tier1 | Tier-1
- Transport Zone: TZ-OVERLAY
- Subnet: Input your subnet CIDR with a .1 for the last octet of the address
- For example 10.255.40.1/24
- If you are using networks smaller than a /24, just add 1 to the network address. For example if you are using 10.255.12.64/28, you would use 10.255.12.65/28.
- Name: Choose a name for the segment, I named mine “wkld-10.255.40.0/24”
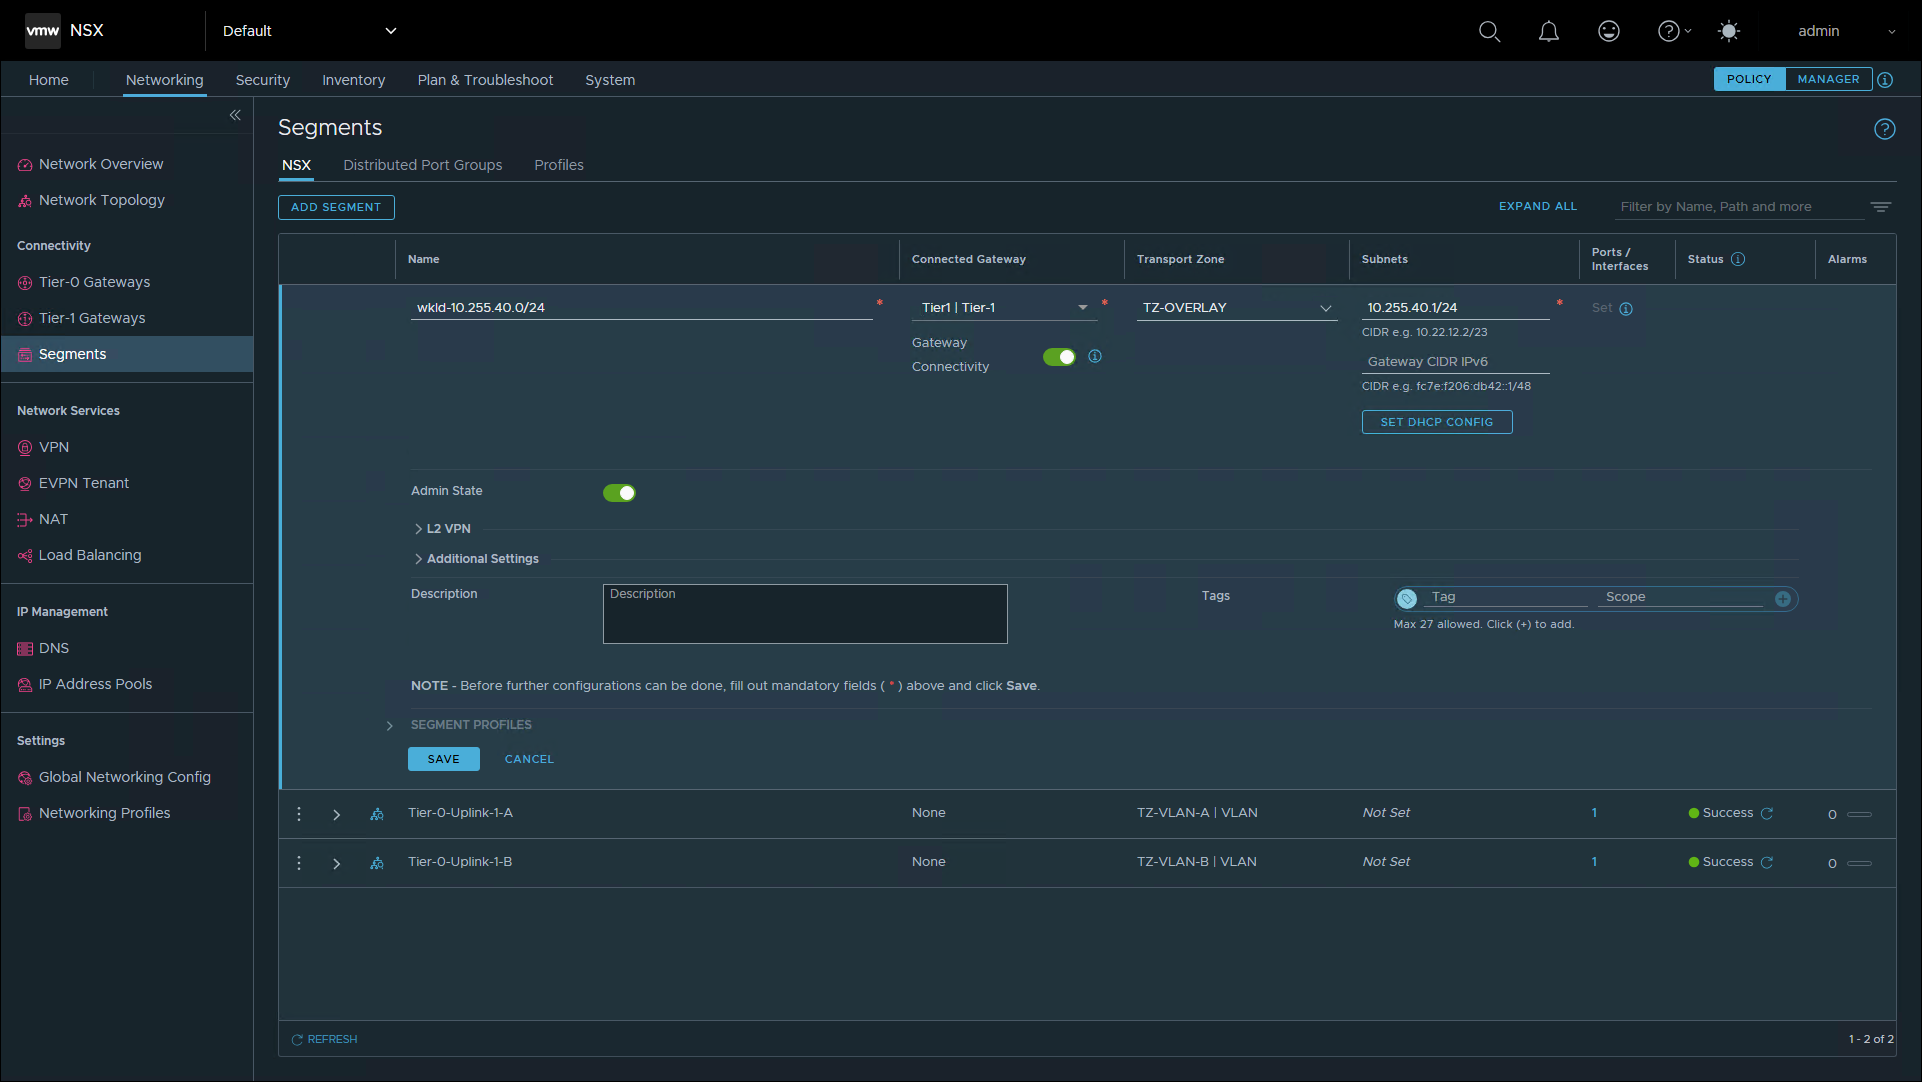
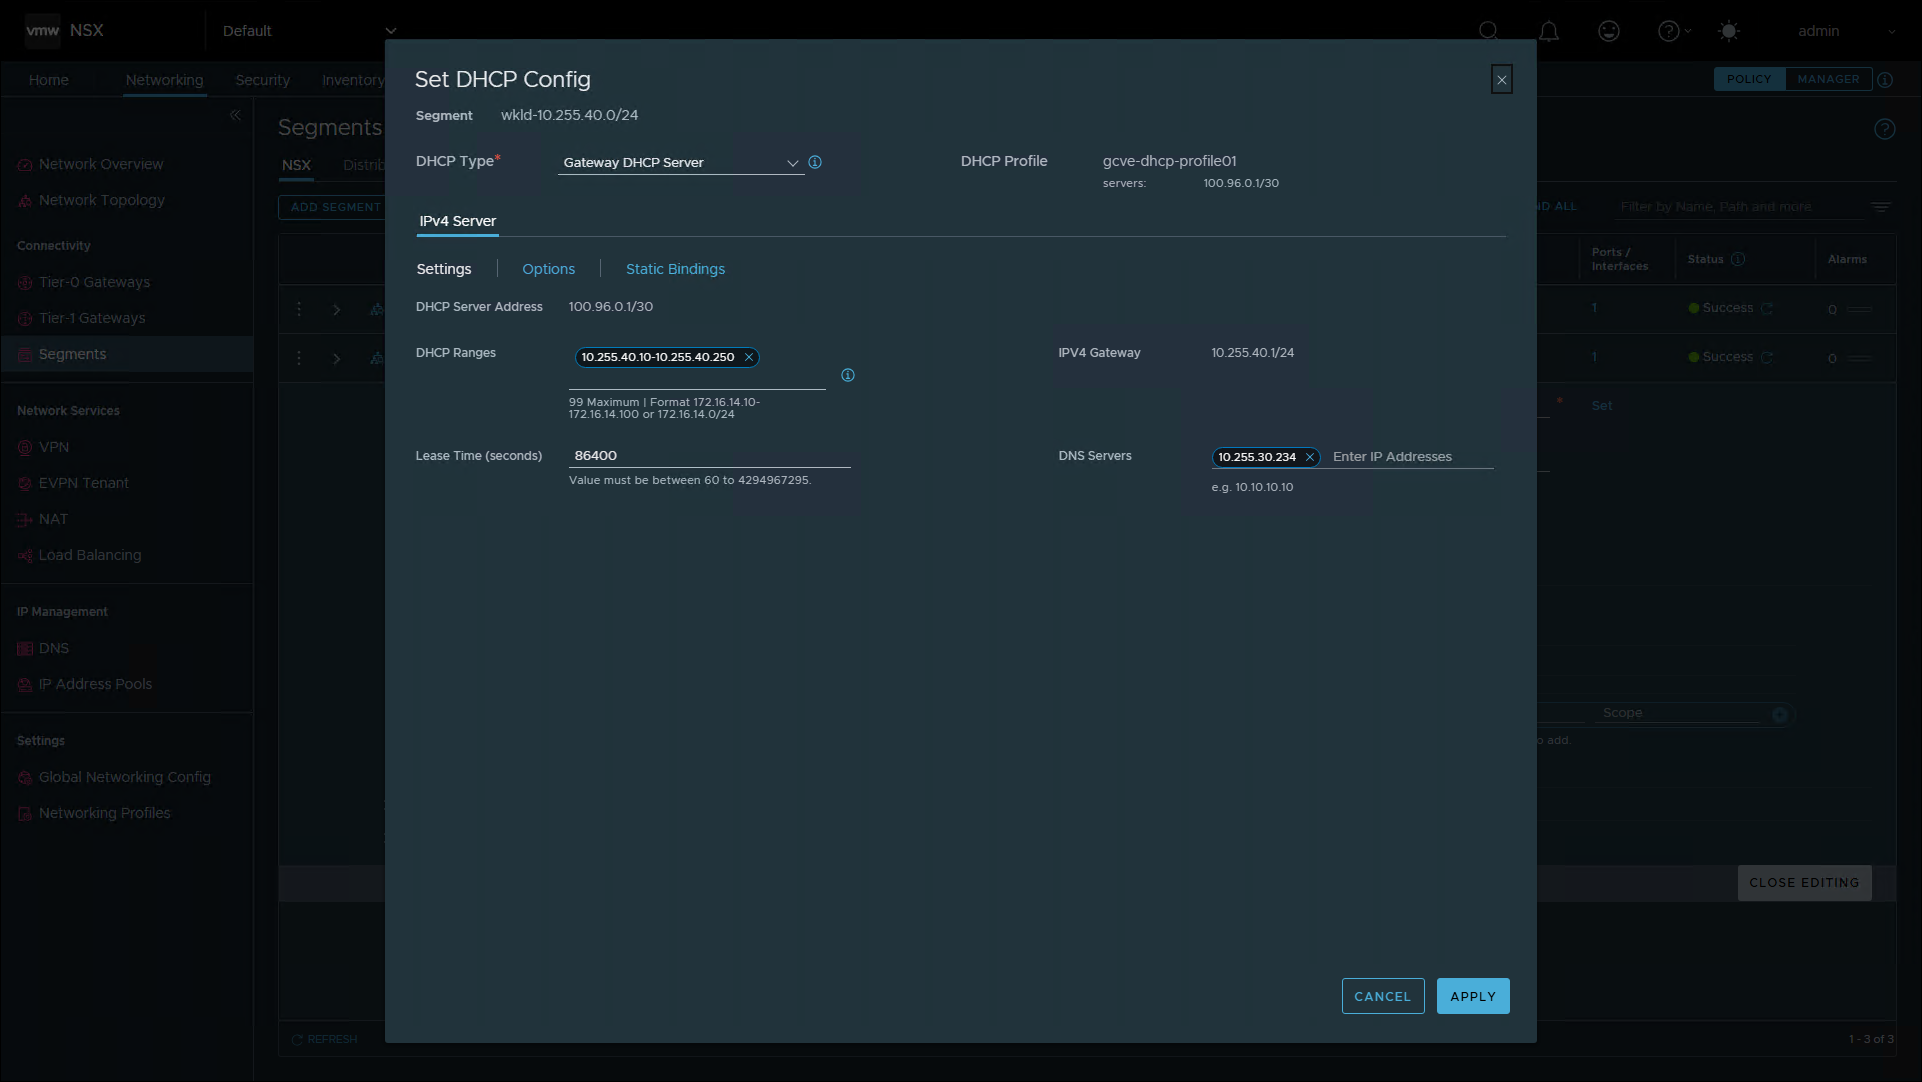
- Click the button to Set DHCP Config
- DHCP Type: I chose a Gateway DHCP Server
- Note: The main reason I did this is because this allows me to use a DHCP server IP outside the segment subnet. (For example, the auto assigned 100.96.0.1/30 address from earlier.) You can choose a Segment DHCP Server if you need DHCP limited strictly to one segment, greater isolation or security, individual DHCP settings per network, support for IPv6, or when the segment is not connected to a Tier-0 or Tier-1 gateway. For centralized DHCP management across many routed segments, a Gateway DHCP Server is preferred.
- The types are defined in the help screen (?) as follows:
- Gateway DHCP Server – Central DHCP service that dynamically assigns IP to the VMs on all the segments that are connected to the gateway and using Gateway DHCP
- Segment DHCP Server – Defines DHCP server that is local to the segment and not available to the other segments in the network. A Segment DHCP server provides a dynamic IP assignment service only to the VMs that are attached to the segment
- DHCP Relay – Defines DHCP relay service that is local to the segment and not available to the other segments in the network. The DHCP relay service relays the DHCP requests of the VMs that are attached to the segment to the remote DHCP servers
- IPv4 Server – Settings
- DHCP Ranges: Specify address ranges
- For example, I used “10.255.40.10-10.255.40.250”.
- I like to reserve a few IP addresses at the begging and end of the scope for if I ever need to assign a static IP in the subnet, but you could also assign all available addresses if you like (i.e. 253 in a /24 -> .2 through .254, where .1 is the default gateway).
- DNS Servers: Specify DNS servers
- For example, I used my GCVE DNS server from my private cloud’s management subnet: 10.255.30.234
- However, you can also use Cloud DNS, or AD DNS elsewhere in the environment.
- DHCP Ranges: Specify address ranges
- IPv4 Server – Options
- Specify any other DHCP scope options as needed
- This screen is where you can assign NTP servers, NIS Servers, Classless static routes, etc.
- Specify any other DHCP scope options as needed
- IPv4 Server – Static Bindings
- This allows you to set DHCP reservations for machines
- DHCP Type: I chose a Gateway DHCP Server
- Click Apply then Save.
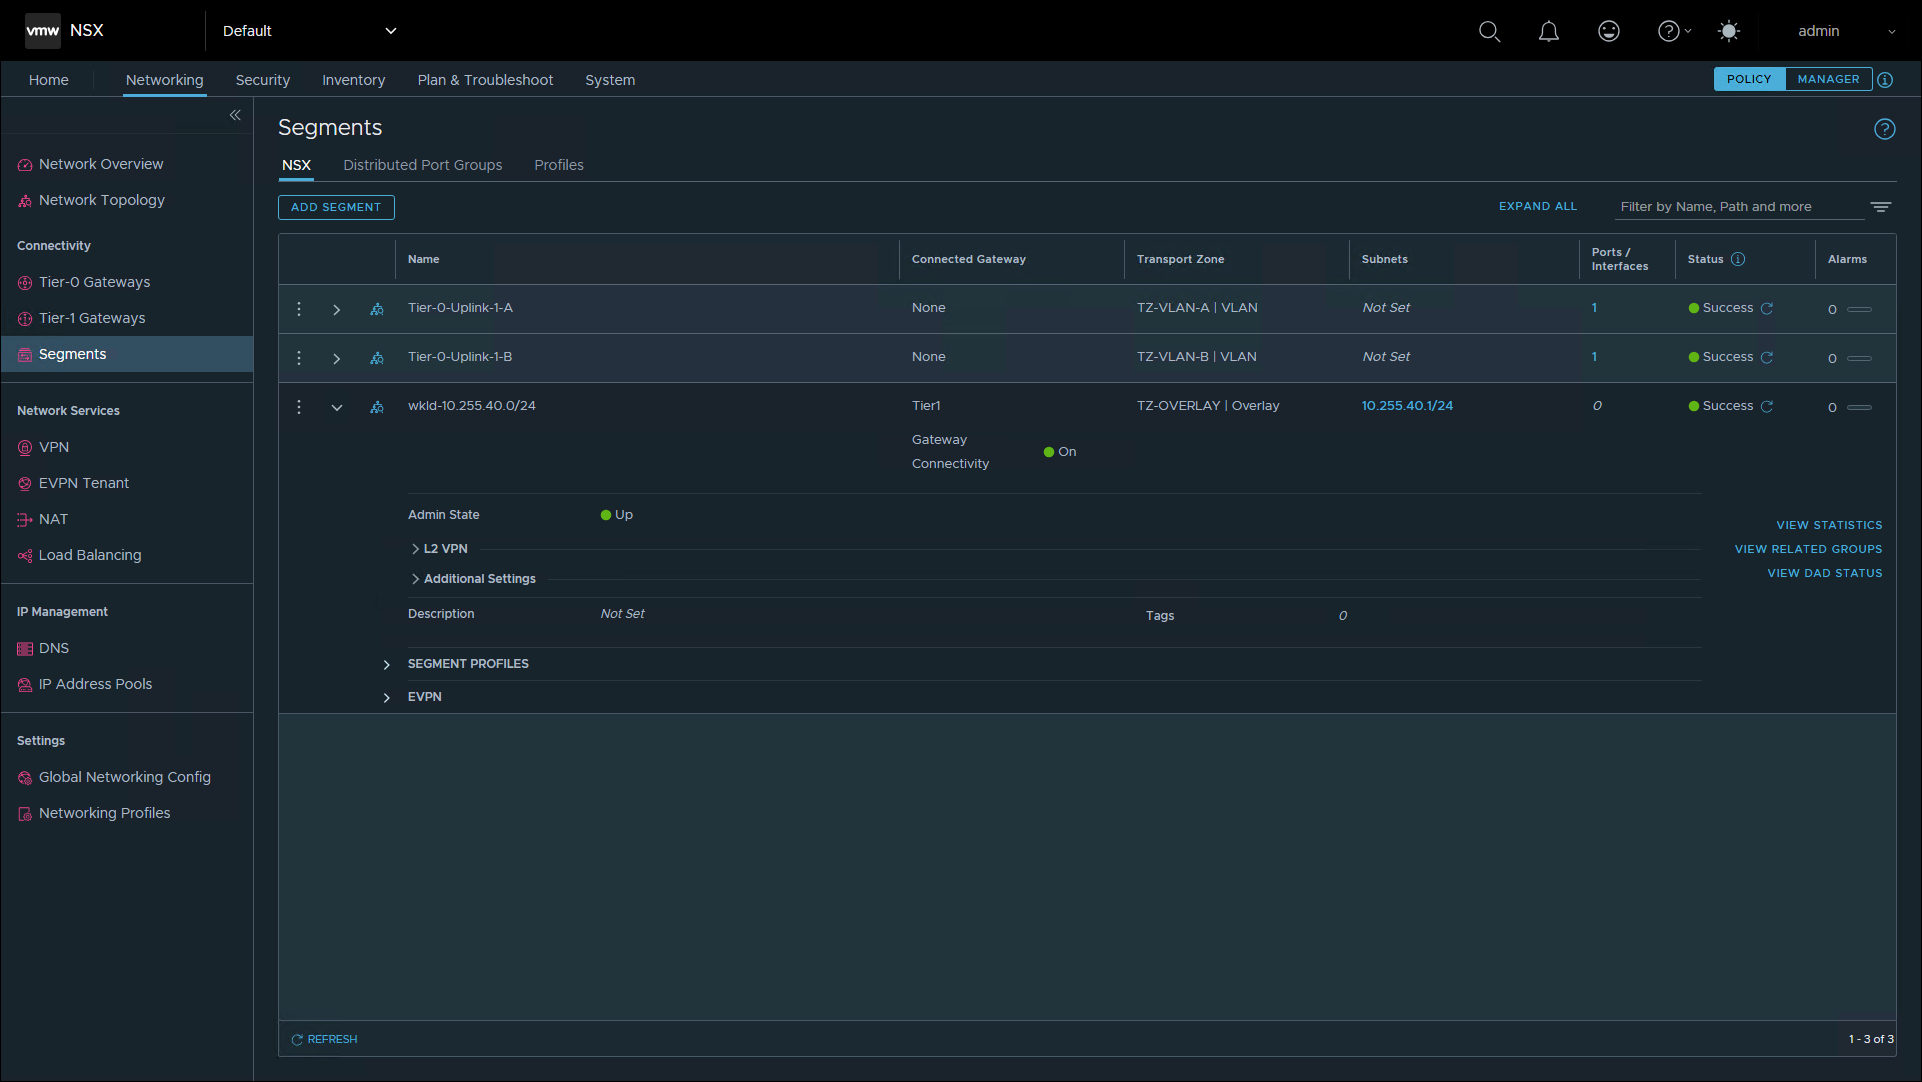
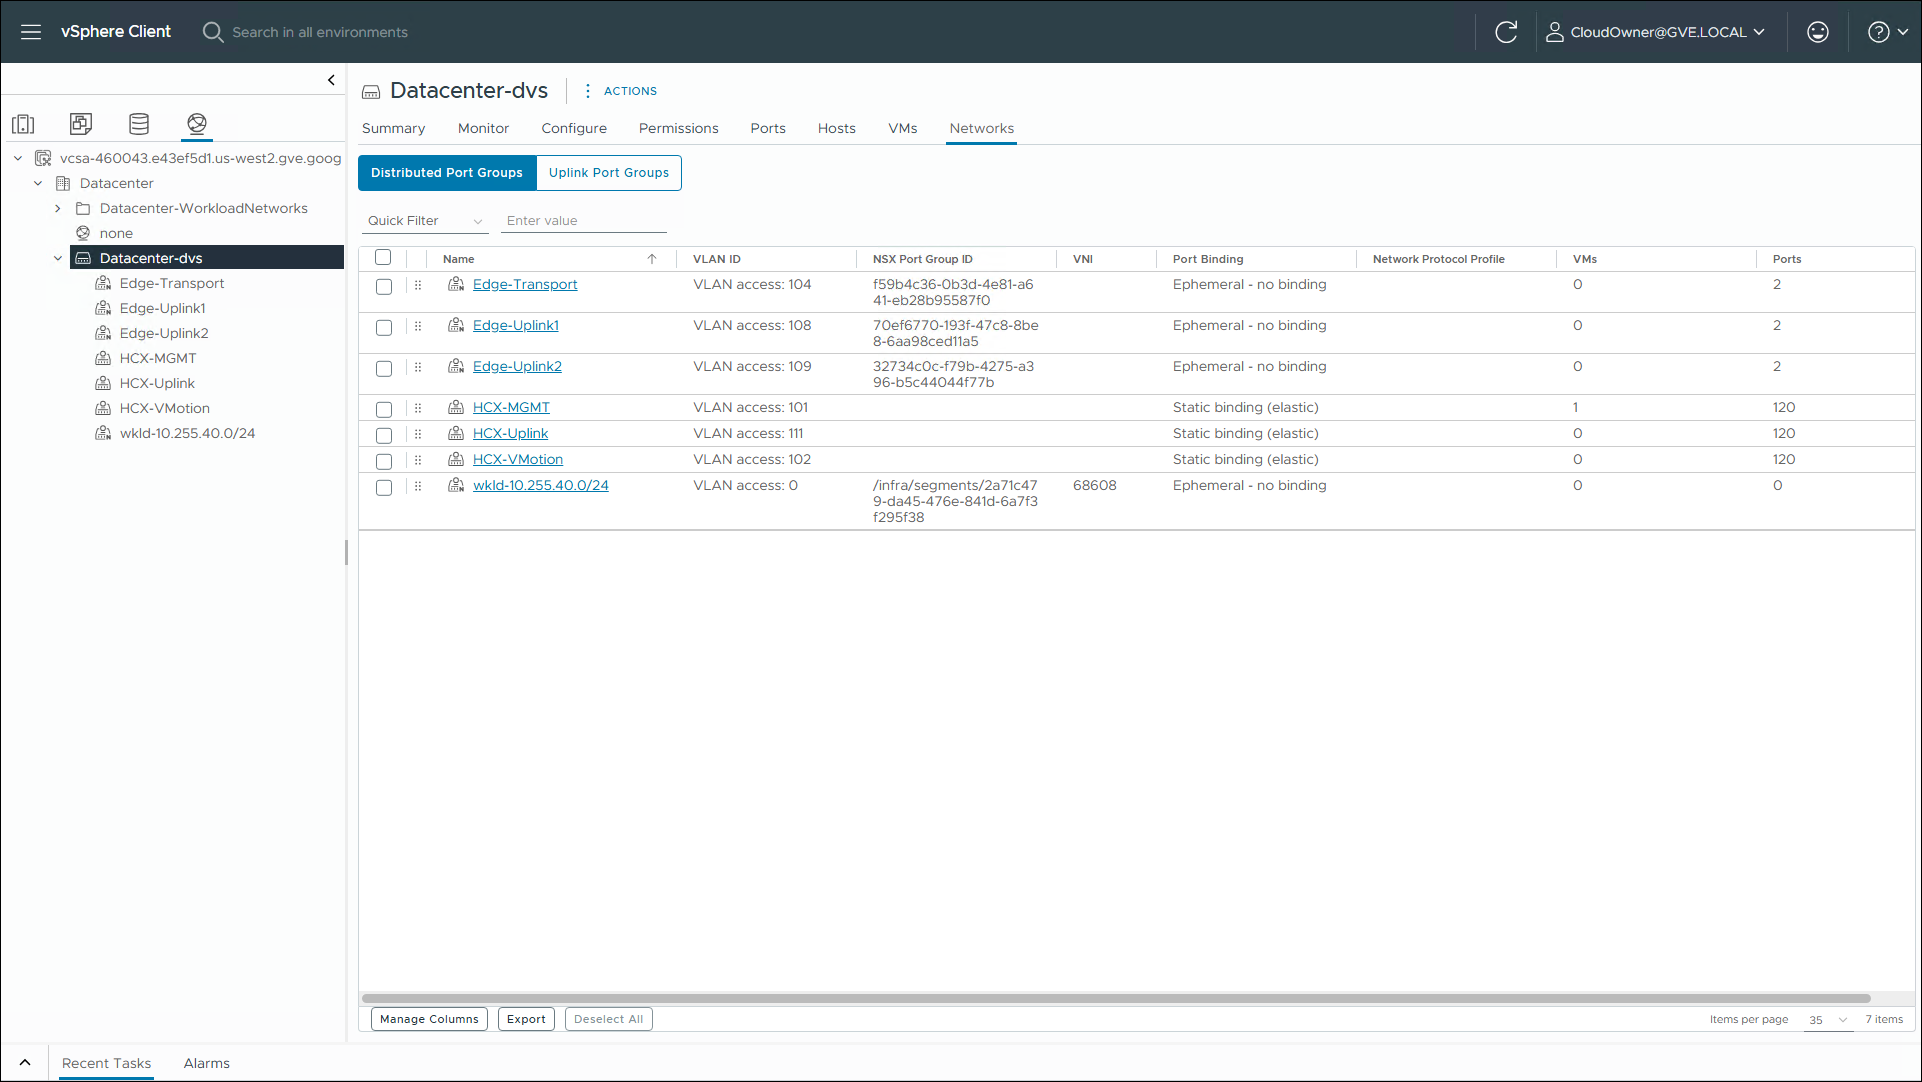
At this point in the process, you can create more segments if needed. When you are all finished, the workload subnets will appear in the vSphere Client networking screen as shown below.
Take away
For those that are new to NSX, or don’t do these type of configurations every day, hopefully this brief walk-through will help you get started quickly!